|
|
| |
|
Ground anchor, three on one
|
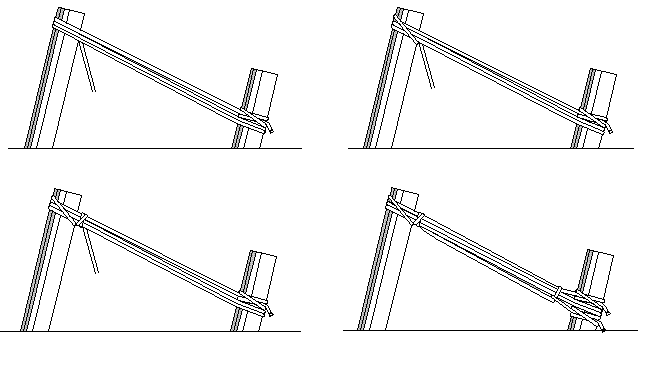
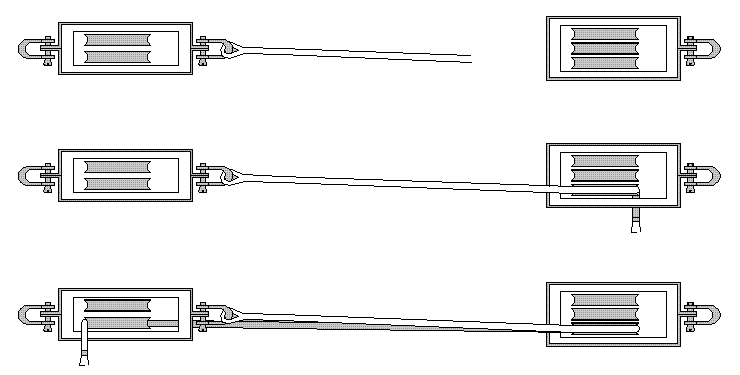
 A "three on one" ground anchor is used in heavy dense soil. It can be made with minimal effort. The goal, securing a load to the ground, is reached
by tying knots as close as possible to the ground.
Two thirds of the poles should be put into the ground. A well constructed 3 on 1 anchor should be able to carry between 500 and 700 kg.
A "three on one" ground anchor is used in heavy dense soil. It can be made with minimal effort. The goal, securing a load to the ground, is reached
by tying knots as close as possible to the ground.
Two thirds of the poles should be put into the ground. A well constructed 3 on 1 anchor should be able to carry between 500 and 700 kg. |
 |
Start connecting the rope at the single pole (this is the posterior pole in the link)
Now make a rope connection with the 2 poles in front. The rope has to be connected as high as possible to gain a lever effect.
(Two to one connection)
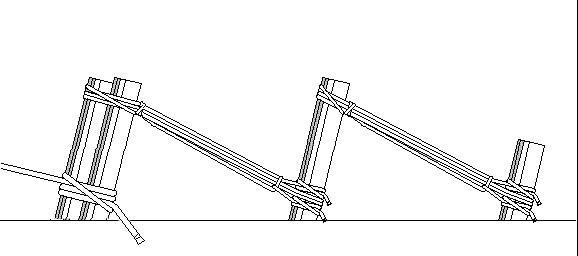 The above drawing shows the effect with the main burden.
 |
| |
|
Ground Anchor, Anchor bar
|
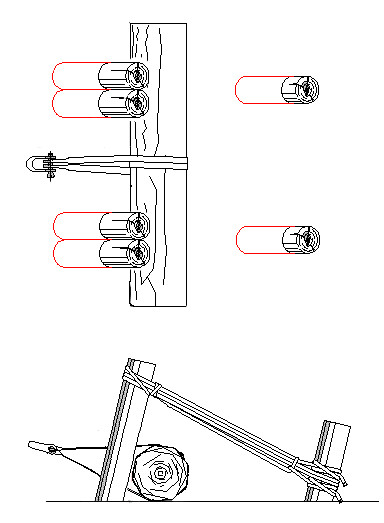
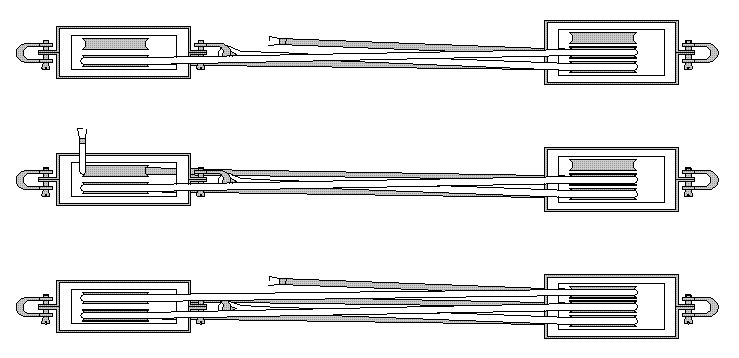
When making an anchor, on which a larger force should be released, you would be wise to choose the
anchor bar. The weight of the beam in combination with the much higher weight of the sand in front of it, will make it possible to carry a higher
burden. This anchor schould be able to carry 1500 to 2000 kg. When doubling the poals (4 on each side in stead of 2) the capacity should be 4000 kg. A disadvantage of the anchor: All supporting points should be carrying and they all must be placed on a line perpendicular on the load or the beam may shift. Placing poales on the end of the beam could be safe.
 |
| |
|
Ground Anchor, Dead man
|
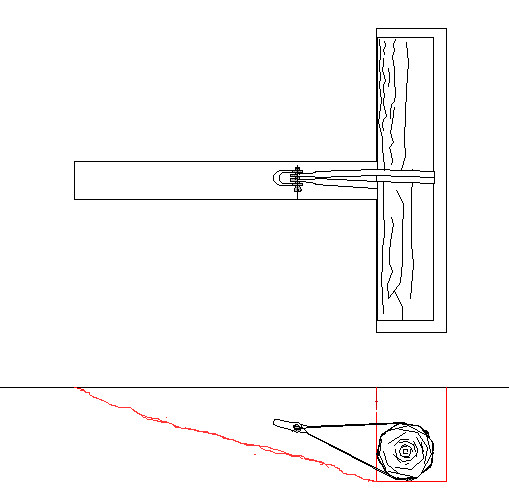
The strongest anchor is the dead man. The weight of the beam in combination with the weight of the sand shall carry the biggest load. Combining multiple beams or placing extra poals in front of the beam shall increase the load carrying capacity. A dead man as drawn should be able to carry 3000 kg. With extra poals and the sand put back this would be up to 8000 kg.
 |
| |
|
Pulleys
|
For moving a load you might want to use pulleys. Working with pulleys is easy.
Connect a pully to an anchor-point (Left, this is the fixed pulley)
The other pulley is connected to the load (right, the non-positioned pulley)
 Connect a pull rope to the fixed pulley.
By turning around the first pulley disk (non-positioned pulley), the force of the burden is turned aroud.
By turning around the first pulley disk (fixed pulley), the force of the main burden gets divided by two.
By turning around the second pulley disk (non-positioned pulley), the force of the main burden gets divided by three.
By turning around the second pulley disk (fixed pulley), the force of the main burden gets divided by four.
By turning around the third pulley disk (non-positioned pulley), the force of the main burden gets divided by five.
Knot the end of the rope to the anchor.
Make a direct connection between the anchor and main load.
Connect a pull rope to the fixed pulley.
By turning around the first pulley disk (non-positioned pulley), the force of the burden is turned aroud.
By turning around the first pulley disk (fixed pulley), the force of the main burden gets divided by two.
By turning around the second pulley disk (non-positioned pulley), the force of the main burden gets divided by three.
By turning around the second pulley disk (fixed pulley), the force of the main burden gets divided by four.
By turning around the third pulley disk (non-positioned pulley), the force of the main burden gets divided by five.
Knot the end of the rope to the anchor.
Make a direct connection between the anchor and main load.
 When the positioned and non-positioned pulley swap positions, the forces will change.
For pictures above, this means the following:
Connect a pull rope to the load. (Full load)
By turning around the first pulley disk (fixed pulley), the force of the main burden gets divided by two.
By turning around the first pulley disk (non-positioned pulley), the force of the main burden gets divided by three.
By turning around the second pulley disk (fixed pulley), the force of the main burden gets divided by four.
By turning around the second pulley disk (non-positioned pulley), the force of the main burden gets divided by five.
By turning around the third pulley disk (fixed pulley), the force of the main burden gets divided by six.
You're stronger but you need to fix your rope to the load.
When the positioned and non-positioned pulley swap positions, the forces will change.
For pictures above, this means the following:
Connect a pull rope to the load. (Full load)
By turning around the first pulley disk (fixed pulley), the force of the main burden gets divided by two.
By turning around the first pulley disk (non-positioned pulley), the force of the main burden gets divided by three.
By turning around the second pulley disk (fixed pulley), the force of the main burden gets divided by four.
By turning around the second pulley disk (non-positioned pulley), the force of the main burden gets divided by five.
By turning around the third pulley disk (fixed pulley), the force of the main burden gets divided by six.
You're stronger but you need to fix your rope to the load. |
| |
|
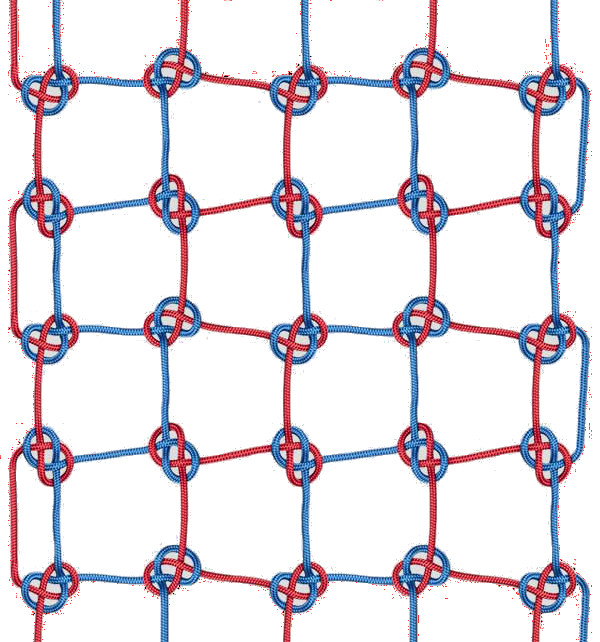
climbing net
|
| There are several ways to make a climbing-net eventually you will, based on: for hands material and feeling, have to make a choice. |
 |
A kind of splice method, ropes are crossed off against each other. The "knot" causes a shift in the grid, the meshes will not lie one above the other. I believe it will give friction between the individual strands, causing a shorter lifespan. |
|
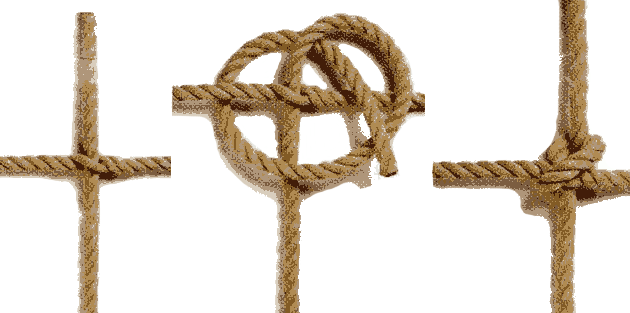
The bend or heel method. Beautiful knot in which the shape of a cross is formed within the rope. Creating equal loopholes will be a challenge. Don't tie yourself up while executing this knot |
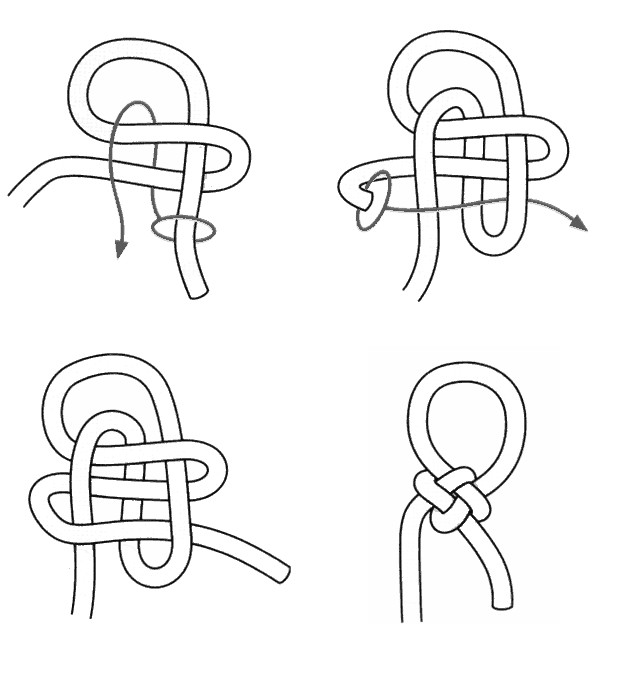 |
Cross Knot (chinese crown or friendship knot). Especially on thick rope it causes much loss of rope in the relatively large knot. I tried it ones and the result was indeed a parrot-net.
|
 |
Half hitch. Fairly easy to make small knot. |
|
| |
|
Coiling Rope
|
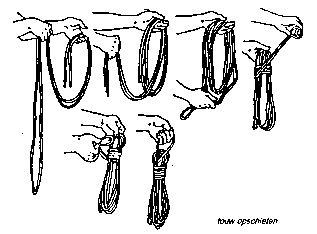
Rope is best kept, without knots, in a dark and ventilated space. Unfortunately your stock wil usually become a big messy pile of rope. To prevent this, ropes are usually coiled in a bundle which is actually designed to keep, the rope, together during transport. For example, on a backpack. A good coiled rope therefore has a loop on which it can be suspended without falling apart during movement. The picture shows the correct implementation. Note that the ends of the rope are placed on the other side of the loop.
 |
| |
|
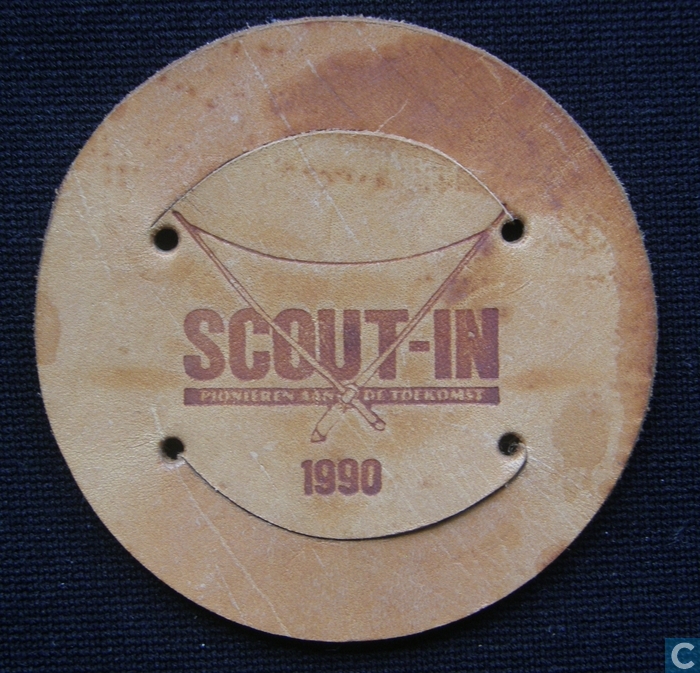
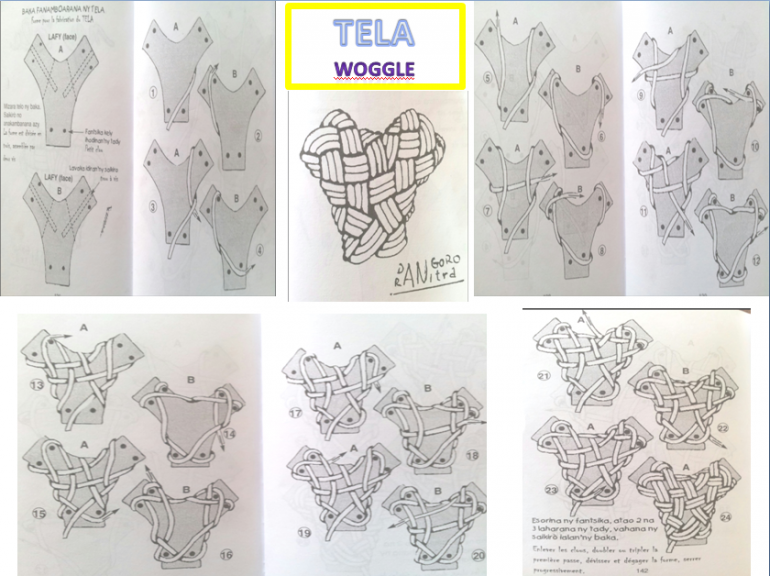
Woggle
|
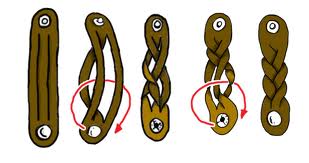
The woggle can be bought at the scoutshop or can be cut out of leather. When you make it yourself the picture below may come at hand.
|
Offcourse there are many more ways to make a woggle. Some examples:


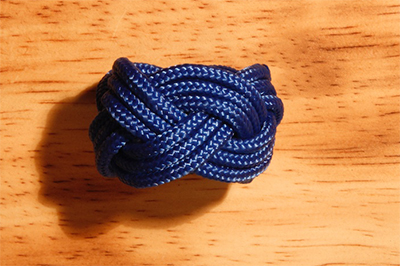
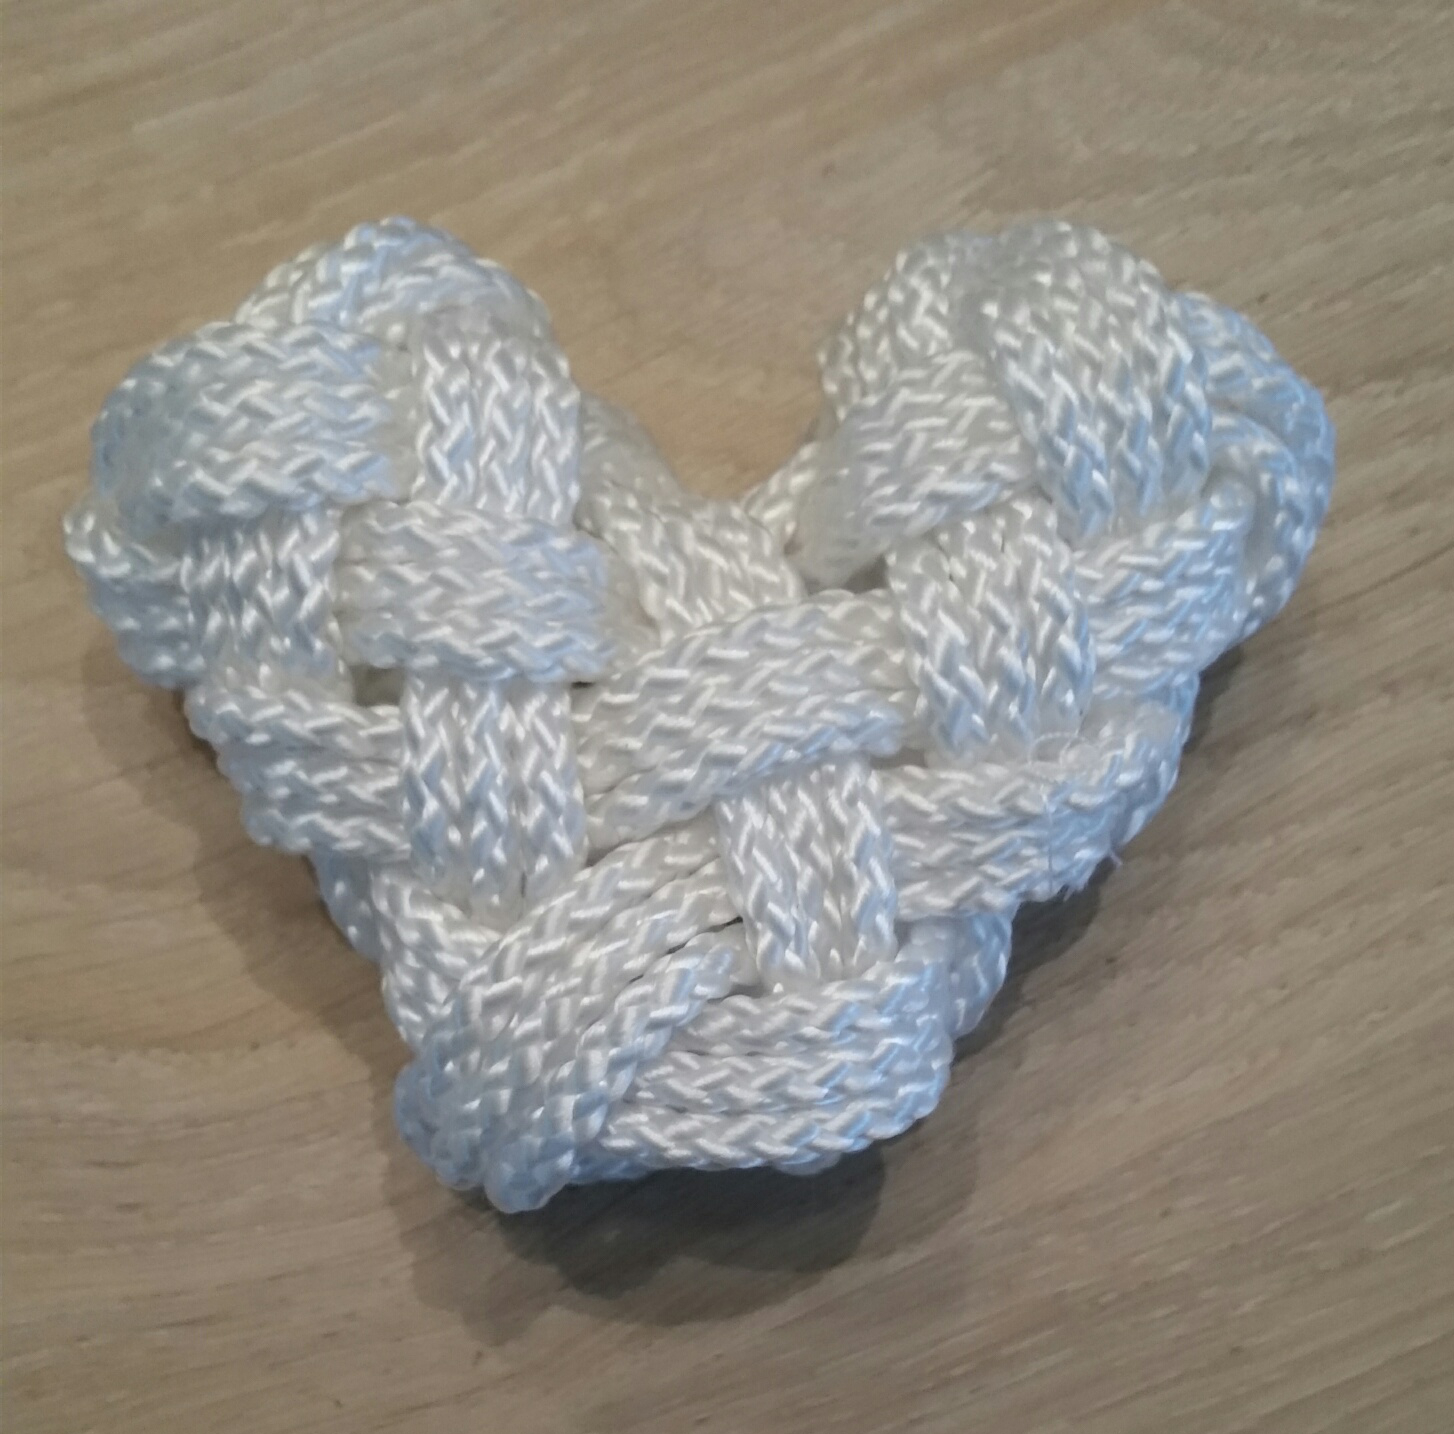
|
In the last ones you may recognize the Turkish knot. Under the way to make the last one.
 |
| |
|
Extra
|
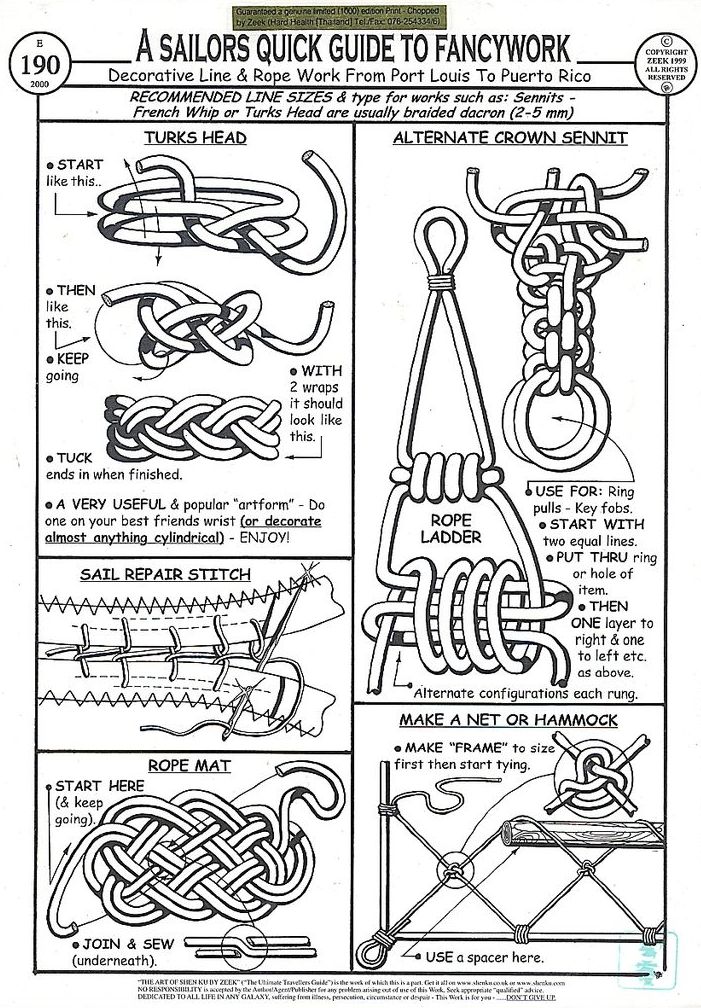
To stimulate the mind a few simple ideas. They are:
Rope-mat, Hammock and repairing cloth.
 |
|
|
|
|